-
Notifications
You must be signed in to change notification settings - Fork 34
Fork & Local Edit & Push
If your are comfortable with Git, GitHub, and Pull Requests and want to propose more substantial changes to our documentation (perhaps even suggesting the addition of a new section) this is the recommended way.
To create a Pull Request (you'll need a GitHub account for this) you should:
- fork the original repository to your GitHub account and then clone it locally onto your machine
- Make any changes that you see fit and save them in your remote repository
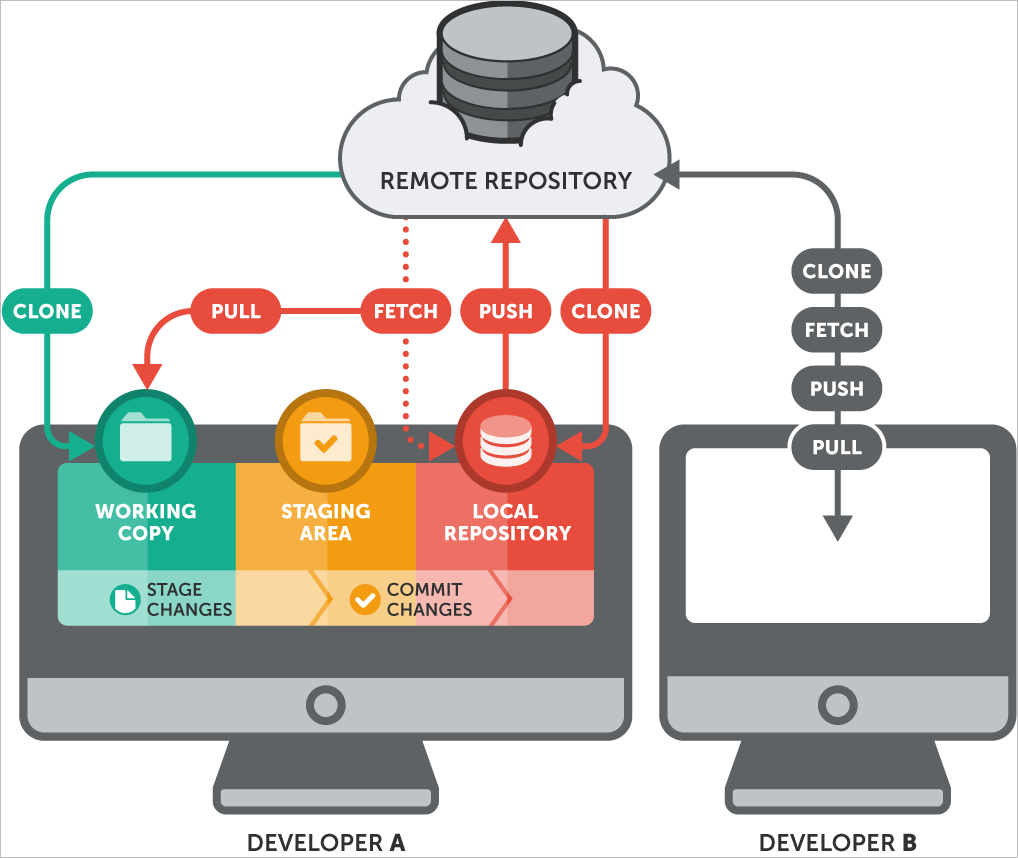
We will be working with a scenario like this:

From your remote (forked) repository you'll be able to create a pull request to the master branch of the original repository.
Once it has been created this pull request (PR) will appear in the gitbook-docs repository where it can be assessed or edited by the Frontity team, and if appropriate, merged with the master branch of the official repository.
The content that appears on the documentation site is generated from the GitHub repository, and is updated every time the master branch is updated.
In our YouTube channel you have a video where we go through this whole workflow, from the fork to creating the Pull Request:
From the official documentation repository click the Fork button.

After the fork process is completed you'll see the fork under your GitHub profile

Clone your fork to your local environment so you can make changes to the files using your preferred text editor.
To do this you can click the Green Clone or download button (in your forked repository) which will give you a URL to copy.

Use this URL to git clone this repository in your terminal:
git clone [email protected]:<your username here>/gitbook-docs.git
If successful, you should see a new gitbook-docs folder created on your machine with the files of your forked repository.
This is the folder that you will be working in. Navigate the files and sub-folders and make any changes that you wish to make.
You should add a remote path to the official repository. This will allow you to pull the most recent changes from the official repository into your local repository at any time, ensuring things are kept up to date and in sync.
To add the remote path for the official git repository, run the following command:
git remote add base [email protected]:frontity/gitbook-docs.git
This command adds a new remote branch, with the name base. If you ever want to pull the recent changes from the official documentation repository to update your local fork you can use the following command:
git pull base master
Ideally you should create a branch for each group of changes that you wish to make. This will keep things simpler for everyone and allow you to work on multiple changes at once if you like.
You can create a branch with this command:
git checkout -b <your branch name>
Remember to use a descriptive and meaningful name when creating your branch, this will help you to remember what its purpose is!
Now you're working on a branch.
From here you can start tracking and saving your changes with commands such as git add and git commit.
To increase the quality of Frontity's documentation this repo includes textlint, a tool that will generate a report over each commit.
The changes that you now have in your local branch can be uploaded to a remote version of this branch (i.e. the same branch but in the remote forked repository in your GitHub account) by running;
git push origin <your branch name>
originrepresents your remote repository
<your branch name>represents a specific branch in your remote repository (you can work in different branches)
Your new branch should now appear in your remote repository. It can be viewed by visiting your remote repository and clicking Branches.

On this page you will see all the branches created in this remote repository.
In the branches page you'll see a New pull request button next to your branch.
By clicking this button you'll begin the process of submitting your changes for review.

Click New pull request.
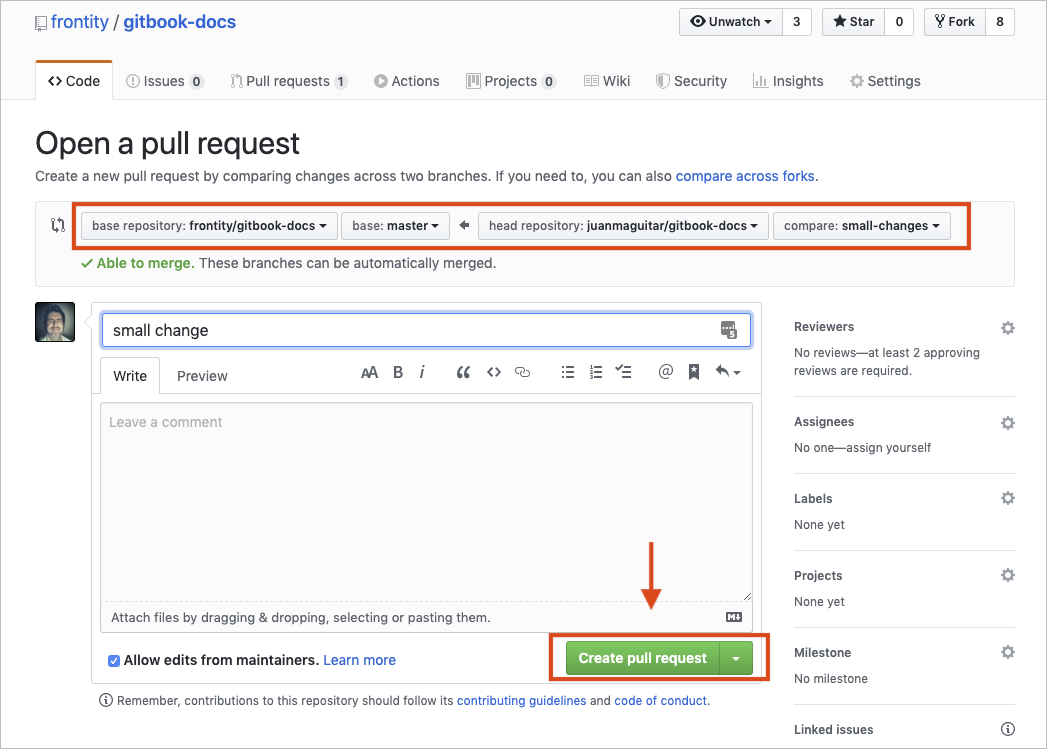
You will be taken to the "Open a pull request" page (in frontity/gitbook-docs) where you can review all the changes that will be included in your Pull Request to the official documentation repository.

Notice that here you're comparing the changes in the
<your branch name>branch of your fork (head repository: <your user name>/gitbook-docsin our example) against the current status ofmasterbranch of the official repo (base repository: frontity/gitbook-docs).
Click the green button "Create pull request" to finally create the PR.
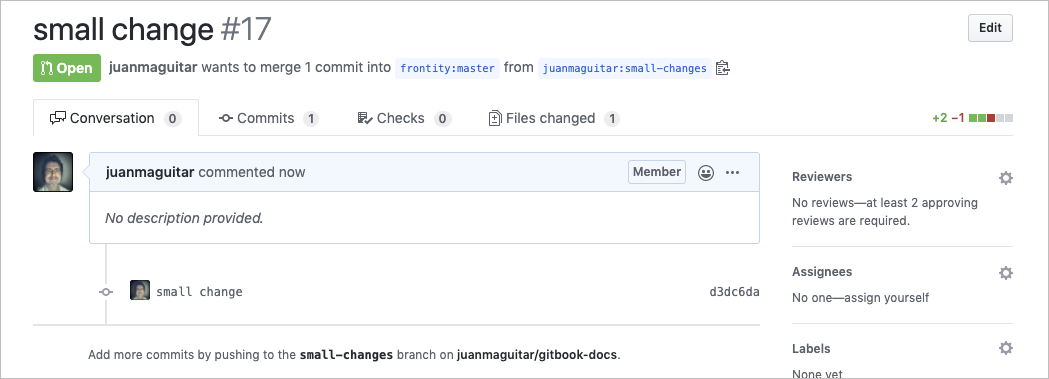
Boom! Your new pull request has been created. Now the ball is in our court.

We will either accept your changes and merge them with the final version or, if we want to discuss the changes, we will start a conversation about them on the Pull Request.
Got questions or feedback about Frontity? We'd love to hear from you. Use our community forum yo ! ❤️
Frontity also welcomes contributions. There are many ways to support the project (and get free swag)! If you don't know where to start, this guide might help → How to contribute?
